Author: Betty Turpin

Conditions, Weather, and Climate #4: The Water Cycle: Painting with Clouds

Lesson Overview:

In this lesson, students review the water cycle, learn about a famous painter, and clean their desks all at the same time!  Three integrated elements, one class period, and a heck of a good time!

Lesson Plan:

Suggested Grades:

3-4

Objective:

To review the water cycle through literature and to show understanding of the stages of the water cycle by “painting” it.

Suggested Time:

40-45 minutes

Success Criteria:

Each child will successfully demonstrate the stages of the water cycle by “painting” it using shaving cream on a desktop.  (Each child will also clean his/her desk in the process.)

Lesson Outline:

1. Introduction:

Ask the children what the water cycle is.  Ask them to name steps in the water cycle.  Be sure to get the idea that the cycle is circular and repetitive.

Explain that the water cycle has inspired many authors and illustrators to make stories.  There are stories about rain, about storms, and about the journey of a single raindrop from the clouds to the sea and back again.

Inform the students that today we will examine the work of one amazingly talented artist, Thomas Locker, and his portrayal of the water cycle.   Ask the children to pay attention to Mr. Locker’s presentation of various phases of the water cycle.  They should think about the number of steps in Mr. Locker’s “Water Dance” so that they can compare it to the more scientific water cycle.

Tell the kids that if they do their work well and follow the instructions carefully, they will get to paint the water cycle by using clouds!

Do not tell the kids in advance that they will be using shaving cream.  Once you announce that, they will not be able to focus on anything else.  Keep the shaving cream a surprise until the end.

2. Main:

Pass out the student handout and go over the instructions together.

Share Water Dance with the class.  Read the poetry and try to have the kids guess which part of water Mr. Locker is describing before showing them the paintings.  Also before showing the kids the artist’s work, ask the kids to imagine what it might look like if they had to paint this scene.

The stages in Mr. Locker’s water landscapes may vary slightly from that which the kids have learned.  That’s okay – they should be able to mentally bridge and understand any differences.

Once the book has concluded, review the water dance with the children.  Ask them how it is the same or different from the water cycle.  Once you are certain that they have a firm understanding of the water dance vs. the water cycle, ask them why Mr. Locker put extra steps in his book.   Why did he go to the effort of painting all those pictures when he could have used a camera?  What was he trying to show with his paintings?  (Answer:  Beauty.  Mr. Locker is trying to convey the beauty of water’s journey through earth, not just it’s scientific steps!)

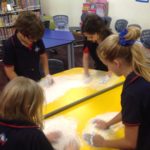
Next, tell the kids that you will give them a cloud.  They will use the cloud to “paint” the water cycle on their desktops.  Each child receives one handful of cloud (ie. shaving cream) and must be careful to use it well.  Once a step is painted, it can be smoothed over and the next step in the water dance painted.  Or groups can work together to “paint” a set of scenes on several desks.  There is room for a lot of creativity in this lesson.

3. Conclusion:

Thanks for thinking about the work of Thomas Locker, the water cycle, and for creating the entire water cycle right here in class!  Tidy up with buckets and cloths – the desks will be sparkling clean!

additional Resources:
  1. Any book of your choice that highlights the water cycle. My favorite is Water Dance by Thomas Locker.
  2. Two cans of shaving cream.
  3. Desktops, cleared of papers, books, and pencils.
  4. Buckets with clean water for rinsing hands
  5. A few washcloths to wipe the desks down afterwards
  6. Camera to take a few photos of the students in action.
  7. Student Handout.
Notes:

Students should have been taught and understand the concept of the water cycle prior to this lesson.

This lesson is also a great one to do as a “one off” on a rainy day or on a day when the classroom needs to be cleaned.

It may be helpful if the water cycle is displayed somewhere in class.

Desks must be clear of most books, papers, and materials before this lesson starts.

One year, two minutes into his shaving cream, a little boy looked at me and shouted, “Hey, you TRICKED US!  We’re CLEANING.”  Be ready.  The kids are smart and will figure this out.  My response was something along the lines of, “Two birds, one stone.”

You must be VERY strict with the kids about not putting shaving cream on each other and not messing around.  Usually it works, but the last minute or two are always exciting!!

Be sure to snap a few photos.  The kids love the tactile aspect of this lesson and really, really have fun with it.

Key Terms:

Water, Water Cycle, Storms, Rain, Thomas Locker, Painters

recommended texts:

Water Dance by Thomas Locker.

example:
Painting with Clouds

Student Handout, Water Dance by Thomas Locker

Conditions, Weather, and Climate #3: Code a Weather Event Using ScratchJr

Lesson Overview:

In this lesson, students continue extending what they are learning about weather by using simple coding software to program a weather event.  Students will be able to make the sun set or rise, send a tornado spinning across a field, or create a thunderstorm.  There is no limit to the weather they can direct!

Lesson Plan:

Suggested Grades:

3-4

Objective:

To showcase unit learning by coding a simple weather event in ScratchJr.

Suggested Time:

40-45 minutes

Success Criteria:

Each student will create a simple program showing one of their understandings from the unit on Conditions, Weather, and Climate.

Lesson Outline:

1. Introduction:

We can show some of our understanding of the weather unit by using a technology tool.  Today I will demonstrate, and you will follow along in a program called ScratchJr.  ScratchJr helps us make a computer program to show our understanding of simple weather and climate concepts.

First watch how I choose a setting and character and give the character instructions using ScratchJr.  Then, use the ScratchJr app to make your own program.

2. Main:

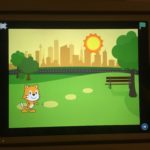
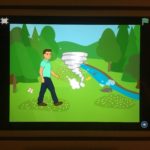
Demonstrate how to use ScratchJr to make the sun set.  Kids will catch on quickly and they can then program their own weather event.  Popular weather events with my kids involved tornadoes in all kinds of settings.

Students should have an iPad and should follow along, thus duplicating the sun setting.  After that, they will be off and running.  Expect the kids to experiment with all the functions and to make some hilarious programs in only a few minutes.

I like to do this lesson with Grade 3 students and it is often their first experience with coding.  I’ve never had a child fail to produce a coded program.  They all get it because the work is visual.  And, I’ve had brilliant success with EAL kids.  Only a little language?  No problem.  You do not need to read or write in English to do well with ScratchJr.  In this sense, the lesson is very EAL-friendly.

3. Conclusion:

Thumbs up or down if you enjoyed using technology to show your learning.  Shall we try to do this kind of lesson again?  (You should get 100% “Thumbs Up.”)

Wrap up by having the children share their coded weather events.  If you can, project the coded programs onto a screen so that all of the children can see.

additional Resources:
  1. 1:1 tablet computers. There is a work-around if you do not have access to tablet computers, but you’ll need to install some special software.  Find the workaround with “Andy Android Emulator” here:  http://www.scratchguide.com/how-to-run-scratchjr-on-windows-and-mac/
  2. Ability to project your tablet so that the kids can see and follow along.
  3. Chairs facing the screen. I reconfigured the classroom and put the tables away for this lesson so that the kids would be seated “theater style” and could easily share their programs with each another.
  4. App, downloaded and installed on your devices.
  5. Here is a link to the ScratchJr. website in case you would like to visit. https://www.scratchjr.org/  I have found the website very helpful each time I have visited.
Notes:

This lesson is going to get loud and wild!  The kids’ creativity runs somewhat out of control very quickly.  After coding a weather event they will want to code silly/funny scenes.  Let them!

You will obviously need to do a bit of work in ScratchJr yourself before this class.  Don’t hesitate, jump right in.  If you don’t know ScratchJr, you need to.  Make the investment now and then you’ll be able to keep a small coding station in the library.

Coding is a 21st Century skill, and all you need are the basics to work with your students.  The kids can do this and learn basic block coding in a 45-minute lesson.  I’ve done it with them many times.

ScratchJr was named one of the Top 10 Tech by School Library Journal in 2016.  You need to have it in your librarian toolkit if you don’t already.

ScratchJr was designed for 5-to-7-year-old children, so third- and fourth-graders will find it very easy!

Key Terms:

Coding, Computer Coding, ScratchJr, Weather

recommended texts
  1. The Official ScratchJr Book: Help Your Kids Learn to Code, by Marina Umaschi Bers and Mitchel Resnick
sample programs:
Teacher Program
Ahmad’s Tornado

Conditions, Weather, and Climate #2: Bookmaking and Weather Words

Lesson Overview:

In this lesson, students make a book using upcycled or recycled materials.  They then fill the book with the weather words they collected in the first lesson.  They can choose to write a fiction story similar to Cloudy with a Chance of Meatballs by Judi Barrett.  Or, they can make a weather word illustrated dictionary.

Lesson Plan:

Suggested Grades:

3-4

Objective:
  1. To learn to make a simple book using recycled materials (can also be an Eco Week Project.)
  2. To begin to fill the book with weather-themed words or write a weather-themed story.  (Fill the book in whichever way makes most sense for your class.)
Suggested Time:

45 minutes to make the book and to complete the cover.  Books can then be finished over time, little by little, whenever kids have a few free moments.

Success Criteria:

Each student will make a book from recycled materials and decorate the cover with an illuminated letter.

Lesson Outline:

1. Introduction:

Books have changed over time.  Hundreds of years ago, books were all made by hand.  In modern times we have eBooks!  Today we will make a book with our hands using recycled materials and decorate the cover using an historical technique with illuminated letters.

2. Main:

Demonstrate how to make the books.  Prepare by watching and using the technique in Susan Kapuscinski Gaylord’s video here:

https://www.youtube.com/watch?v=zW30a5mRT04

Help the kids make the books.  I usually use terminology like this:

  • Fold each paper in half so that it is long and skinny, a “hotdog fold.”
  • Make sure that any marks on the scrap paper are on the inside of the fold.
  • Fold the long skinny pieces in half, “sandwich folds.”
  • “Nest” the folded pages inside each other. Be sure that all folded edges are UP and all loose edges are DOWN.
  • Match corners and then punch two holes in the left-hand side. The holes should be about 6 cm apart.
  • Push the rubber band through the holes and loop it around the stick/pencil/crayon on both ends to complete the binding.

The rubber band is the hardest part for kids to manage on their own.  It will take about one adult for every eight kids to ensure that the books are put together correctly.

Ask the children to write their names on the backs of the books once the books themselves are complete.

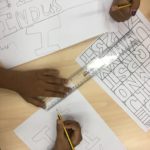
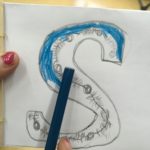
Cover Illustration:  Show the children how to make a block letter and have them choose a block letter that matches one of their weather words.  They should have time to work on the cover illustration.

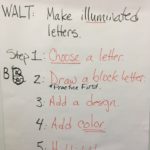
Give the kids these five steps:

  1. Choose a letter.
  2. Write a block letter (practice first on a piece of scrap paper!)
  3. Sketch in a design
  4. Add color
  5. Add “illumination” – an outline, highlight, or bit of gold/silver to make the letter beautiful!

3. Conclusion:

Make sure that every child has a completed book, that there is a cover illustration, and that the child’s name and class are on the back cover.

additional Resources:
  1. Two sheets of scrap paper per child. If the weather books need to be a bit longer, use three sheets of scrap paper per child.
  2. One stick, old pencil, or crayon approx. 8-10 cm. in length per student (If you can’t find enough old pencils, you can use a craft stick.)
  3. One rubber band per student.
  4. Hole punch.
Notes:

Kids REALLY enjoy this activity.  Be prepared for them to want to make more than one book, or to make their books longer or larger.  I usually let them make one to work on at school and one to take home for fun so long as the materials hold out.

Susan Kapuscinski Gaylord is an expert on bookmaking with children.  She has published a book herself which contains bookmaking techniques from around the world.  I have purchased her book and have found it to be a valuable resource.  If you would like to have a look at it, you can find it either on amazon or Etsy.

Handmade Books for a Healthy Planet by Susan Kapuscinski Gaylord.

Key Terms:

Bookmaking, Upcycling, Handmade Books, Crafts, Publishing, Weather

recommended texts:

Handmade Books for a Healthy Planet by Susan Kapuscinski Gaylord.

block/illuminated letters:
Illuminated Letter Instructions
Block Letter Practice
S for Sky

Conditions, Weather, and Climate #1: Cloudy with a Chance of Meatballs, by Judi Barrett

Lesson Overview:

In this lesson, students “tune in” to their unit on weather.  Using a popular story, students collect weather words.  Collecting weather-related words requires the kids to be concentrated listeners!  You will be surprised at what they come up with and how inspired they are by Judi Barrett’s classic tale!

Lesson Plan:

Suggested Grades:

3-4

Objective:

To “Tune In” to the new Unit of Inquiry on weather by listening for and capturing weather-related vocabulary words.

Suggested Time:

45 minutes

Success Criteria:

Each student will complete a list of weather-related words to be used in later assignments.  Word list should be between 30 and 50 words.

Lesson Outline:

1. Introduction:

Begin by showing books from the library or magazine articles about weather.  Some of my favorites include:

  • Water Dance by Thomas Locker
  • Rain Drop Splash by Alvin Tresselt
  • Sunny Day by Anna Milbourne
  • Sun and the Wind, Retold by Mairi Mackinnon
  • Listen to the Rain by Bill Martin

Weather has inspired writers, thinkers, and artists for centuries.  Today we’ll have a lot of fun with a very imaginative book on weather.

2. Main:

Read Cloudy With A Chance of Meatballs by Judi Barrett.  Read slowly so that the kids can write down the weather words they hear.

Ask children to make a numbered list and write down every weather word they hear in the story.  Kids should think broadly.  For example, “mountain” could be considered a weather word because the presence or absence of mountains affects air flow and weather patterns.  Another example is the word “report.”  “Report” is often used in the term “weather report.”

Once the story has wrapped up, have the class work with you to make a comprehensive class list of weather words.  As kids provide words, children should tick-off the words on their own papers that have already been given.  The last time I taught this lesson the kids came up with 49 weather words from the story.

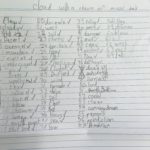
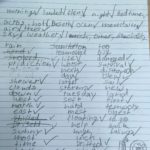
Refer to the word list in the student work samples (attached) for some of the words that kids should hear and record from the story.

3. Conclusion:

Ask children to review their notes, number their lists (if not already numbered) and contribute to a group discussion.  Compile a class list of all the weather words in the story.  Make sure the kids understand the words.  Clarify any unfamiliar words like “drizzle” or “drift.”

Thank the children for their work and attention.

Ask kids to tuck the word lists away with their Unit of Inquiry folder or Literacy folder (teacher’s choice).  They will be used in a follow-up lesson.

additional Resources:
  1. Clipboards, lined paper, and pencils.
  2. Cloudy With A Chance of Meatballs by Judi Barrett.
  3. White board, chalk board, flip chart, Promethean board or some way to capture the class’ thinking.
  4. Weather word list (see word list in Notes below).
Notes:

Kids LOVE this lesson.  They are captivated by the imagery, and the story really invites their own imaginations to run wild.  And, it’s a simple lesson to prepare.  Hardly any preparation time is needed.

Be sure to use the weather vocabulary in a follow-up lesson or activity.  Here are two suggestions:

  1. Have the kids make a little handmade book and make up their own crazy weather story, following the pattern in Judi Barrett’s book. They can use their imaginations to write in their own favorite foods.
  2. Have the kids use the words to create their own illustrated dictionary of weather terms.
  3. Weather words from Cloudy with a Chance of Meatballs by Judi Barrett.:


  1. Air
  2. Ocean
  3. Mountains
  4. Desert
  5. Trees
  6. Sky
  7. Weather
  8. Rain
  9. Snow
  10. Blew / Blow
  11. Wind
  12. Storms
  13. Weather Report
  14. Weather Prediction
  15. Coming Down
  16. Shower
  17. Clouds
  18. Sprinkled
  19. Northwest
  20. Shift (wind shifted)
  21. East
  22. Drizzle
  23. “Becoming heavy”
  24. “With Occasional”
  25. “Periods of”
  26. Clearing
  27. West
  28. Fog
  29. Violent (“violent storms”)
  30. Hurricane
  31. Downpour
  32. Flooded
  33. Drifts
  34. Tornado
  35. Falling (“snow falling.”)
Key Terms:

Weather, Weather Patterns, Climate, Rain, Snow, Storms, Clouds, Cloudy

recommended texts:
  1. Water Dance by Thomas Locker
  2. Rain Drop Splash by Alvin Tresselt
  3. Sunny Day by Anna Milbourne
  4. Sun and the Wind, Retold by Mairi Mackinnon
  5. Listen to the Rain by Bill Martin
  6. Cloudy With a Chance of Meatballs by Judi Barrett
student work samples:
Student Work Sample, Alex
Student Work Sample, Iulia

Culture: Beliefs and Values #4: Valuing Books in Time of War

Lesson Overview:

This lesson offers students a contrast in belief systems. Although many countries and cultures value literacy and the literary tradition, wartime poses threats.  The text and lesson introduce students to one brave librarian in Iraq who heroically tried, and succeeded, in salvaging a library in her war-torn country.

Lesson Plan:

Suggested Grades:

4-5

Objective:

Have students experience a specific point in time in which books were threatened due to war.  Understand how and why a few people responded to this danger.  (Contrast with lesson about how cultures around the world value books).

AASL 2.3.2:  Consider diverse and global perspectives in drawing conclusions.

AASL 4.4.4:  Interpret new information based on cultural and social context.

Suggested Time:

30-40 minutes

Success Criteria:

Students will answer a few short questions about the true story of Alia Mohammad Baqer and how she saved a library collection from destruction.

Lesson Outline:

1. Introduction:

Review last week’s lesson:  My Librarian is a Camel.  Today continues our inquiry into how different cultures and societies value, or in this case do NOT value, books.

2. Main:

Read and discuss text with class.  Have them take a few notes to capture their ideas and the discussion.

Have a map, atlas, or globe handy so that you can show the children where this story took place.

3. Conclusion:

Emphasize that books and the information and ideas in them help us learn and make a better world.  People in most places value books and what they can do for us.  Wars can destroy much that we value.

additional Resources:
  1. The Librarian of Basra by Jeanette Winters.
  2. Student Handout (see attached).
  3. Article about Alia Baqer, the real librarian of Basra. This article is within the grasp of older elementary students and was published around the 10th anniversary of Alia Baqer’s heroic rescue of the library.  http://english.alarabiya.net/en/life-style/2013/03/17/Basra-librarian-saved-30-000-books-during-2003-invasion.html
Notes:

Sometimes I use an image of burning books on the screen as the children enter the classroom.  It is quite a provocation since the first lesson in this unit focused so heavily on valuing books.  This book burning image should elicit a response from them!

Be careful.  Some students may have witnessed war or come from war-torn countries.  The text is quite gentle, but use caution.  Refer all questions about why soldiers came or why bombs were dropped to the children’s parents if there is concern about the historical or political context.

Key Terms:

Librarians, Libraries, Iraq War, Iraq, Alia Muhammad Baqer, Conflict

student handout:

Student Handout, The Librarian of Basra

Recommended Texts: 
  1. The Librarian of Basra by Jeanette Winters