Category: How the World Works

Life Cycles #4: Fran’s Flower

Lesson Overview:

In this lesson, students learn what plants need to grow.  This is a very simplified “plant life cycle” lesson, but with a darling literature link.   Do plants eat pizza, cheeseburgers, or ice cream?  Have your students discover what plants need to thrive, then complete a simple drawing to show their understanding.

Lesson Plan:

Suggested Grades:

K–1 

Objective:

To know that plants need soil, water, and sunshine to grow.  (AASL 4.1.8, “Use creative and artistic formats to express personal learning.”)

Suggested Time:

35-40 minutes

Success Criteria:

Each student will complete a series of three simple, labeled drawings to show their understanding of what plants need to grow.

Lesson Outline:

1. Introduction:

Remind the students that they are learning about life cycles.  They have looked at the human life cycle, including infants and growing children.  Explain that today they will look briefly at how plants grow.

  • Ask students if they have ever planted a seed. What happened?
  • Ask students if they have ever seen a large tree. How did that tree begin its life?  Was the tree always big?
  • Ask students what a plant needs to change from a seed into a plant. (This will assess how much they already know.)

2. Main:

Tell the students that today they are going to read a story about a little girl named Fran.  Fran, unfortunately, did not understand much about lifecycles!

Share the story of Fran and her flower.  Follow up with thinking questions such as:

  1. What did Fran think her flower needed to grow?
  2. What did Fran’s flower really need to grow?
  3. What do the plants in our neighborhood need to grow?
  4. What would happen if you tried to feed your bushes, trees, or flowers people food?
  5. Why did Fran’s flower start to grow once she put it outside?
  6. How is a plant’s life cycle like a person’s life cycle?
  7. How is a plant’s life cycle different from a person’s life cycle?

Explain the assignment to the students.  Hold up an assignment sheet and talk through the “What I’m looking for” statement as well as the instructions.  The children should be able to say right away that a plant needs:

  • Soil
  • Sun and Fresh Air
  • Rain

to grow.  Ask them to sketch simple pictures of Fran’s flower (or any plant of their choosing) getting the things it needs to grow.  If they need it, help the children label their drawings.

3. Conclusion:

Show the children some books from the library’s collection about plants.  Encourage them to read about different kinds of plants and find out more about plant life cycles.  Fran’s flower was a simple story, but there is much more we can learn about plants in our world.  Scientists who study plans are called botanists.  Be a botanist and learn a few more things about plants by checking out some of the library’s plant-themed books.

Resources:
  1. Fran’s Flower by Lisa Bruce and Rosalind Beardshaw.
  2. Copies of Student Handout (attached).
  3. Colored pencils, crayons, markers, etc.
  4. Soil, egg cartons, and seeds (optional)
  5. A collection of the library’s books about flowers, trees, and plants (nonfiction).
Notes:

Although Fran’s Flower is a simple story, I find that the kids get a big kick out of it.  I love teaching this lesson because it is easy to understand, easy to prepare, and EAL-friendly, and I can pull it out quickly if one of my periods gets cut short and I need a shorter-than-normal kid-pleaser.  The lesson can also easily be used in any lesson on the environment, living vs nonliving things,  or even a seasonal lesson at springtime.

If you want, you can easily expand this lesson by having the children plant seeds.  I usually don’t do that, however, because the homeroom teachers almost always do!  If the homeroom teachers have kids working with plants that were bought as young plants, and if the kids have never planted a seed, be sure to plant seeds with them.  A couple of seed packets, one package of potting soil, and some thrift-store pots or old mugs, and you’re all set!

Recommended books for this lesson:

Fran’s Flower by Lisa Bruce and Rosalind Beardshaw

Key Terms:

Flowers, Plants, Life Cycles, Growth (Plants)

Student Handout, Fran’s Flower

Life Cycles #3: Growing Up: Little Bear’s Little Boat

Lesson Overview:

In this lesson, students think about growing up.  What are some of the things that will change as they grow?  How will they cope with these changes?  They already know the basic parts of a lifecycle, but growth happens in between.  The concepts in the life cycle unit tie perfectly to Eve Bunting’s sweet, simple, yet profound story of a little bear and his little boat.  And, if you have time, teach the children Raffi’s timeless “Everything Grows.”  They’ll be humming it all day and the lesson will stick!

Lesson Plan:

Suggested Grades:

Early Years–1

Objective:

To understand that all living things grow and change over time.  (AASL  2.3.1, “Connect understanding to the real world.”)

Suggested Time:

35-40 minutes

Success Criteria:

Each student will be able to name five items she has outgrown, what happened to the items, and how his or her life changed as a result.  Each student will also to be able to sing a simple song about growing, “Everything Grows” by Raffi.

Lesson Outline:

1. Introduction:

Remind the students that they are learning about life cycles.  Last week they looked at babies and what babies can do.  This week, the children will work with the concept of growth and what happens to some of our favorite items once we have outgrown them.

Show the cover of Little Bear’s Little Boat by Eve Bunting and Nancy Carpenter.   Ask the children if bears really sail around a lake in boats.  Of course not!  So, this is a fiction story, but we can still connect with it.  Ask the children to look for connections between what they are learning in their life cycle unit and Little Bear.  How many connections will they be able to find?

2. Main:

Share Little Bear’s Little Boat by Eve Bunting and illustrated by Nancy Carpenter.    Check for understanding by asking questions such as:

  • What did Little Bear love more than anything in the world?
  • What did he like to do with his boat?
  • What happened when Little Bear began to grow?
  • How did Mother Bear explain the situation to Little Bear?
  • What did Little Bear decide to do?
  • What would you do?

Class Activity:  Brainstorm and scribe a list of things that the children outgrow.  Just as Little Bear outgrew his boat, the students have also outgrown lots of things.  Ask the children to be specific so that the list is as long as possible.  Some items might include:

High chair                               Winter coat                             Crib

Booster Seat                          Gloves                                      Baby Blanket

Socks                                       Snowsuit                                  Teddy Bear

Pants                                       Wagon                                      Baby Books

Shirts                                       Riding Toy                                Stroller/Pram

Dresses                                   Infant Cup, Sippy Cup            Onesies

Infant swing                           Little Boat, Kite, etc.

T-Ball Bat                                Shoes

Ask the children what they do with their toys, games, books, and clothes when they are outgrown.  What did Little Bear do with his Little Boat?  What can they do with their outgrown items?  Scribe their answers as well.   A copy of this work can go back to the classroom as evidence of learning.

3. Conclusion:

If there is time, teach the children Raffi’s timeless song, “Everything Grows.”  This song has been around for a while but it fits the Unit of Inquiry perfectly and is a great complement to Bunting’s text.  If the children can read, pass out copies of the lyrics.  If not, simply speak the words of the song and then ask the children to sing along – they will be able to do it!

Resources:
  1. Little Bear’s Little Boat by Eve Bunting and illustrated by Nancy Carpenter.
  2. A collection of the library’s books about growing up. Titles could include: Verdi by Janell Cannon; We Are Growing by Laurie Keller, illustrated by Mo Willems; and When I Grow Up by Mercer Mayer.
  3. Video recording of Raffi singing “Everything Grows,” found here: Raffi’s “Everything Grows.”
  4. Lyrics to Raffi’s song, “Everything Grows.” (attached).
Notes:

Although the Bunting text is short and simple, I find this lesson to be very effective.  In my experience, children like to talk about how they have grown and changed.  This story, activity, and song ask them to reflect on their own growth in the context of their Unit of Inquiry.  (Key Concept:  Reflection.)  It is an old favorite of mine, and I know that it will work for you as well.

Recommended books for this lesson: 

Little Bear’s Little Boat by Eve Bunting.  (The book is out of print, and you may have a hard time finding anything except for a board book edition.  When I checked, Powell’s Used Books had a few reasonably priced hardback copies.)

Key Terms:

Growth, Size, Bears, Eve Bunting, Boats

Lyrics, Everything Grows by Raffi

Life Cycles #2: Infancy, Babies

Lesson Overview:

In this lesson, students think about the first part of the human life cycle, infancy and the toddler stages.  Using some of the library’s books about babies and toddlers, children will play “Guess the Baby” and be able to explain some of the things that babies and young children can do.  This is a Unit of Inquiry lesson with a strong literature connection and a fun game!

Lesson Plan:

Suggested Grades:

K–2

Objective:

To understand that all people started life as babies, that babies require special care, and that there are many things that babies can do.  (AASL 1.1.1, “Follow an inquiry based process in seeking knowledge in curricular subjects . . . )

Suggested Time:

35-40 minutes

Success Criteria:

Each class will prepare a short summary of at least ten things that babies can do.  Each student will also play the “Guess the Baby” game.

Lesson Outline:

1. Introduction:

In the last lesson the students learned the stages of a human life cycle.  Ask the children to remind you of what the stages of a human life cycle are.

Explain that today they will learn more about the first phase of a human life cycle, infancy and early childhood.  When human beings are in their infancy, we say that they are babies.  Ask the students how many of them have a baby in their home or in their family.  Allow time for one or two of them to tell about their babies.

Mention that later in the lesson they will get to see some baby pictures of special people.  But, do not give away that you have collected baby pictures from their teachers!

2. Main:

Share Guess the Baby by Simon French and Donna Rawlins.  Make sure the children understand that:

  • Every person, no matter how old, started life as a baby.
  • Babies are not able to do what school-aged children can do.
  • Babies need special care and lot of love to grow and learn.

Ask the children what we can do to help take care of babies.  Record their ideas on a piece of flipchart paper so that it can go back to class with them.

Teach a few pages from All About Me by Selina Young.  The book is too long to use in its entirety, but it will help the kids start to brainstorm about what babies and young children learn to do in their first few years of life.  If you prefer a shorter book that does the same thing, consider using Baby Can Bounce! by Lynne Chapman.

Ask the children what babies can do.  Record their ideas on flipchart paper so that it can go back to class with them.  (Example: Babies can cry, babies can smile, babies can eat, babies can sleep, babies can reach for a toy, babies can laugh, etc.)

Play “Guess the Baby” just like in the story.  Ask the children if they can correctly identify the people that these babies have grown up to be!  See “Resources” for how to prepare this game.  I like to play the game last, because after the game the kids will be very wound up and excited – there will be no more teaching moments once you show the pictures and let them start guessing.

3. Conclusion:

Wrap up by reminding the children how special babies are, and what a special time of life infancy is.  Challenge them to find a book to take home that is a story about a baby or a family with a baby.  Also, if you have board books, encourage the children to take home a board book and share it with a baby in their families.

Resources:
  1. Guess the Baby by Simon French and Donna Rawlins.
  2. All About Me: A Hundred Things That Happened To Me Between 0 and 3 by Selina Young.
  3. Baby Can Bounce! By Lynne Chapman.
  4. Baby photos from all the teachers who work with this grade level, mounted for display. I usually just make a “lift-the-flap” type activity on a piece of flip chart paper.  Be sure to include teaching assistants, specialist teachers, the school nurse, cafeteria workers, and administrative colleagues.  Gather as many baby pictures as you can so that the guessing game will be fun and challenging.  It is best to prepare a set of baby pictures for each class so that they can take the game with them and use it throughout the unit.
  5. Flipchart paper and markers to record children’s ideas.
Notes:

This lesson can fits well in a unit on families, but I have placed it in a unit on human life cycles.  It requires a bit of preparation because you have to gather and prepare the photos, but the effort is well worth it.

The “Guess the Baby” game was originally the idea of my Early Years colleagues at The International School of Stuttgart.  When I was asked to provide my picture, I realized what a perfect learning activity this is and that it matched Guess the Baby by Simon French.  I’ve kept my picture in the library ever since with the simple caption “Guess Who?  1969 Kindergarten” (attached).  It attracts a lot of attention, and the children are continually fascinated to see their teachers as children.

If colleagues do not have baby pictures, you can use any picture from early childhood as well.  You do not need to be strict about the photo being of a baby, just anything that would show the teacher or  member of staff as a very young person.

Recommended books for this lesson:
  1. Guess the Baby by Simon French and Donna Rawlins.
  2. All About Me: A Hundred Things That Happened To Me Between 0 and 3 by Selina Young.
  3. Baby Can Bounce! By Lynne Chapman.
Key Terms:

Life Cycles, Babies, Infants, Growth and Development


Guess Who 1969 Kindergarten

Life Cycles #1: Our Family, From Baby to Grandma, by Monica Hughes

Lesson Overview:

In this lesson, students think about the human life cycle.  How do humans begin?  Were grown-ups ever babies?  What do different stages of a human life cycle look like?  Used to “tune in,” this lesson enables you to get a feel for how much the children know at the beginning of the unit.  Through simple drawings, children will show their understanding of a human life cycle.

Lesson Plan:

Suggested Grades:

K–2 

Objective:

To understand that human beings have a life cycle and to identify basic stages of the human life cycle.   (AASL 1.1.1, “Follow an inquiry-based process in seeking knowledge in curricular subjects, and make the real-world connection for using this process in own life.”)

Suggested Time:

40-45 minutes

Success Criteria:

Each child will complete a series of simple drawings to show his or her understanding of the human life cycle.

Lesson Outline:

1. Introduction:

Explain that the class is starting a new unit of inquiry about life cycles.  Ask if anyone knows what a life cycle is.  How does a life cycle start?  (Answer:  With birth or a new life.)  How does long does a life cycle last?  (Answer:  That depends on the kind of organism it is and what happens to it during its life.)  What happens between the beginning of life and the end of life?  (Answer:  Living!!)  Explain that all living things have a life cycle and that today we will try to find out what happens to people as they grow, develop, and change.

2. Main:

Teach Our Family, From Baby to Grandma by Monica Hughes.  The book talks about families, not directly about life cycles.  But, using this information and talking about the pictures, the children can put together a framework for how humans grow.  There are other texts that do this more explicitly, but I like this text because there are very few words and the children must do their own thinking.   This text also places different stages of human development within a family, which is, I think, most appropriate for young children.

Based on the reading and discussion, try to get the children to name:

  • Infancy (Babies)
  • Childhood (Children)
  • Adulthood (Adults)
  • Elder Years (Elderly People like Grandmas and Grandpas)

Extend the lesson by asking children to draw a simple picture of each stage of the human life cycle.  They are usually able to do this in about 10 minutes.  Pass out the student assignment sheet (attached), go over the instructions, and give the children time to complete the drawings.

3. Conclusion:

To wrap up, ask the children where they are in their own life cycle.  Ask them where their parents are and where their grandparents are.  Ask whether anyone has a baby in the family and, if so, how the baby’s stage compares to their own life cycle stage.  Explain that next week we’ll be looking more closely at the first stage of a human’s life cycle, infancy or babyhood.

Resources:
  1. Our Families, From Baby to Grandma by Monica Hughes
  2. Copies of the student assignment (attached)
  3. Pencils
Notes:

Be careful when using the words “dead” or “death.”  Some children have never experienced the death of a loved one or pet.  And, if they have, they may not understand it or be prepared to talk about it.  Avoid using these words and focus exclusively on living and the human life cycle throughout the unit.

My experience in this unit is that the teachers focus on animal or plant lifecycles, but human life cycles are often not part of their content.  If your teachers are not working with the human life cycle, there is a lot of literature to support this aspect of the Unit of Inquiry.

Recommended books for this lesson:

Our Families, From Baby to Grandma by Monica Hughes

Key Terms:

Life Cycles, Babies, Infants, Physical Characteristics

Student Handout, Drawing Human Life Cycle

Conditions, Weather, and Climate #4: The Water Cycle: Painting with Clouds

Lesson Overview:

In this lesson, students review the water cycle, learn about a famous painter, and clean their desks all at the same time!  Three integrated elements, one class period, and a heck of a good time!

Lesson Plan:

Suggested Grades:

3-4

Objective:

To review the water cycle through literature and to show understanding of the stages of the water cycle by “painting” it.

Suggested Time:

40-45 minutes

Success Criteria:

Each child will successfully demonstrate the stages of the water cycle by “painting” it using shaving cream on a desktop.  (Each child will also clean his/her desk in the process.)

Lesson Outline:

1. Introduction:

Ask the children what the water cycle is.  Ask them to name steps in the water cycle.  Be sure to get the idea that the cycle is circular and repetitive.

Explain that the water cycle has inspired many authors and illustrators to make stories.  There are stories about rain, about storms, and about the journey of a single raindrop from the clouds to the sea and back again.

Inform the students that today we will examine the work of one amazingly talented artist, Thomas Locker, and his portrayal of the water cycle.   Ask the children to pay attention to Mr. Locker’s presentation of various phases of the water cycle.  They should think about the number of steps in Mr. Locker’s “Water Dance” so that they can compare it to the more scientific water cycle.

Tell the kids that if they do their work well and follow the instructions carefully, they will get to paint the water cycle by using clouds!

Do not tell the kids in advance that they will be using shaving cream.  Once you announce that, they will not be able to focus on anything else.  Keep the shaving cream a surprise until the end.

2. Main:

Pass out the student handout and go over the instructions together.

Share Water Dance with the class.  Read the poetry and try to have the kids guess which part of water Mr. Locker is describing before showing them the paintings.  Also before showing the kids the artist’s work, ask the kids to imagine what it might look like if they had to paint this scene.

The stages in Mr. Locker’s water landscapes may vary slightly from that which the kids have learned.  That’s okay – they should be able to mentally bridge and understand any differences.

Once the book has concluded, review the water dance with the children.  Ask them how it is the same or different from the water cycle.  Once you are certain that they have a firm understanding of the water dance vs. the water cycle, ask them why Mr. Locker put extra steps in his book.   Why did he go to the effort of painting all those pictures when he could have used a camera?  What was he trying to show with his paintings?  (Answer:  Beauty.  Mr. Locker is trying to convey the beauty of water’s journey through earth, not just it’s scientific steps!)

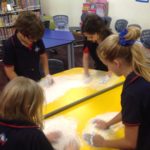
Next, tell the kids that you will give them a cloud.  They will use the cloud to “paint” the water cycle on their desktops.  Each child receives one handful of cloud (ie. shaving cream) and must be careful to use it well.  Once a step is painted, it can be smoothed over and the next step in the water dance painted.  Or groups can work together to “paint” a set of scenes on several desks.  There is room for a lot of creativity in this lesson.

3. Conclusion:

Thanks for thinking about the work of Thomas Locker, the water cycle, and for creating the entire water cycle right here in class!  Tidy up with buckets and cloths – the desks will be sparkling clean!

additional Resources:
  1. Any book of your choice that highlights the water cycle. My favorite is Water Dance by Thomas Locker.
  2. Two cans of shaving cream.
  3. Desktops, cleared of papers, books, and pencils.
  4. Buckets with clean water for rinsing hands
  5. A few washcloths to wipe the desks down afterwards
  6. Camera to take a few photos of the students in action.
  7. Student Handout.
Notes:

Students should have been taught and understand the concept of the water cycle prior to this lesson.

This lesson is also a great one to do as a “one off” on a rainy day or on a day when the classroom needs to be cleaned.

It may be helpful if the water cycle is displayed somewhere in class.

Desks must be clear of most books, papers, and materials before this lesson starts.

One year, two minutes into his shaving cream, a little boy looked at me and shouted, “Hey, you TRICKED US!  We’re CLEANING.”  Be ready.  The kids are smart and will figure this out.  My response was something along the lines of, “Two birds, one stone.”

You must be VERY strict with the kids about not putting shaving cream on each other and not messing around.  Usually it works, but the last minute or two are always exciting!!

Be sure to snap a few photos.  The kids love the tactile aspect of this lesson and really, really have fun with it.

Key Terms:

Water, Water Cycle, Storms, Rain, Thomas Locker, Painters

recommended texts:

Water Dance by Thomas Locker.

example:
Painting with Clouds

Student Handout, Water Dance by Thomas Locker